I like adding printies to projects as they can really add detail to scenes, they are easily accessible and of course cheap. You do need a colour printer, a scanner is helpful and access to the internet to really make the most of them although I know many people successfully use magazines and books.
The best thing about printies from the Internet is that you can find the right pieces for practically any project.
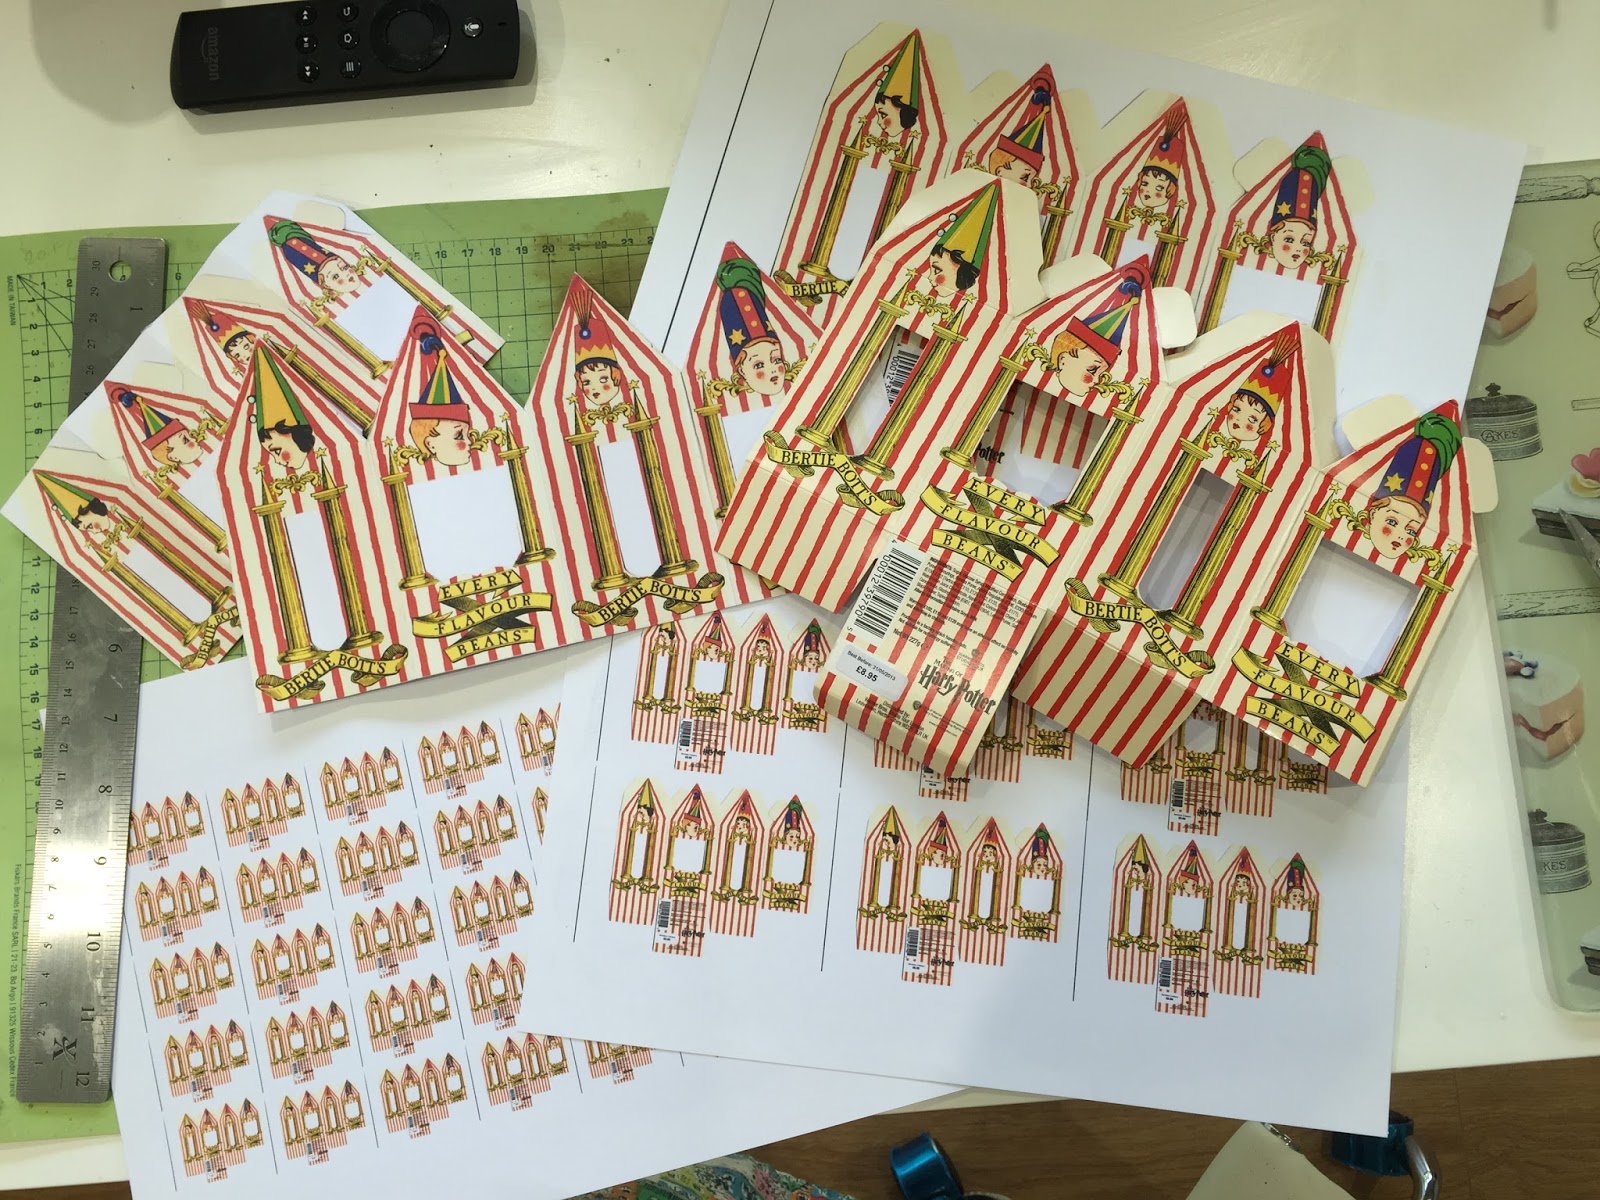
 Today I have been playing with the printies for the tall windows of Honeydukes. I bought some Bertie Botts Beans when I visited the Harry Potter Exhibition a couple of years ago and of course kept the packaging! I then scanned the original box and re-sized it on my computer. I now have big ones.....
 .......and small ones. I always use Word Picture Format for my printies as I have found Photoshop just too difficult and time consuming.
 Then using an image I found on the Internet I have printed off various sizes of Exploding Bon Bons.
 The sizes are both for the window displays and for individual boxes in the shop. I have printed them all on a very heavy duty paper as they will need to maintain their shape. It is difficult to judge sizes sometimes, even though the computer will show you actual size, I have not yet discovered the magic way and it is usually trial and error to be honest.
 This MicroGlaze by Judikins is perfect for protecting printies and all sort of items, I have even used it on wood as it is much more slippery than beeswax. It seals and enhances all things paper and while it comes in a very small tub, a little goes a long way. A coating of this glaze also makes them much easier to cut out and your paper is much less likely to rip.
 This is a medium sized box of beans that I have scored, very important a I have learnt to my cost, along the folds ready to put together.
 What you can't do is forget that scoring is not cutting though!! Luckily this was the large box so I could use a bit of tape.
 These are my essential pieces of kit. Two sharp craft blades in different lengths, a steel ruler and a good craft mat that is only used for paper work. No gluing or painting, a very clean mat as you don't need globules of dried glue messing up your nice clean cuts. You could also use very sharp small scissors if you prefer.
 More by luck than judgement I bought a steel ruler with a felt backing which is brilliant as it doesn't slip. Unfortunately these aren't cheap but they are worth the investment.


Here is the reason you need to keep a separate mat for paper cutting. This was supposed to be my 'clean' mat but got lazy, which meant I had to give it a good wash and scrub, and a wavy cutting mat is not great for cutting!
Now I need to find some very heavy books and hope it will flatten out eventually.
Lots of cutting out to do over the next couple of days and then the part I find the hardest actually putting the pieces together. I have never been very successful with boxes or baskets made from paper so I am hoping to have greater success with these.
Have a super mini - ing Wednesday everyone.
Great job on the printies they look fab, going to have to look out for the micro glaze as that stuff looks cool. X
ReplyDeleteHi Ali, I really like the glaze and it not only seals your work but also brings out the colours nicely. You can certainly see the difference in before and after.
DeleteHi Ali, I really like the glaze and it not only seals your work but also brings out the colours nicely. You can certainly see the difference in before and after.
DeleteMe gustan mucho las cajas que has hecho,son geniales y quedarán fantásticas en tu `proyecto!!!!
ReplyDeleteTomo nota del Micro Glaze que no conocía,lo probaré!!!!
Besos.
Gracias, Pilar.
DeleteGracias, Pilar.
DeleteThanks for the tip on the glaze stuff. Have you tried using PowerPoint for making printies, it's much easier to move them on the page and resize them as you can drag them exactly where you want them and piece images together.
ReplyDeleteLook forward to seeing more of your amazing project.
Hi Natalie, I have never used Powerpoint but I will certainly give it a try. Moving things in Word is a bit hit and miss but I have always used Microsoft and found PhotoShop just a step too far. As Powerpoint is Microsoft I will hopefully be a little more adept!!
DeleteHi Natalie, I have never used Powerpoint but I will certainly give it a try. Moving things in Word is a bit hit and miss but I have always used Microsoft and found PhotoShop just a step too far. As Powerpoint is Microsoft I will hopefully be a little more adept!!
DeleteYour printies look good. Don't worry about the mat, mine straightened out ok, try leaving it flat in the sun for a while. Gill x
ReplyDeleteHi Gill, I will wait for another sunny day and pop mine into the garden. At the moment it is weighted under a pile of books but without much success. Thanks for the tip.
DeleteHi Gill, I will wait for another sunny day and pop mine into the garden. At the moment it is weighted under a pile of books but without much success. Thanks for the tip.
DeleteYes. Printies are nice, but yours look great.
ReplyDelete