Sunday 29 November 2015

Still Learning About Trees, Leaves, Rice Paper and Japanese Crepe Paper.

The first thing I have to admit to is that despite collecting loads of tutorials regarding plant making and making note of all the tips from Mary Kinolch's FB Group I have ignored a basic truth. That is: don't bother researching if you are going to ignore what all those generous miniaturists tell you!! 
If you are undertaking a big project choosing the right materials is fundamentally important and it is a lesson I have learnt to my cost this week.
There are many very talented craftspeople who use filter papers, cartridge paper, floral tape and any paper they have to hand and create marvellous plants but if you only have basic home skills and need to be led by the hand, like me, using tried and tested materials saves both time, money and energy.
So what have I been playing with.....
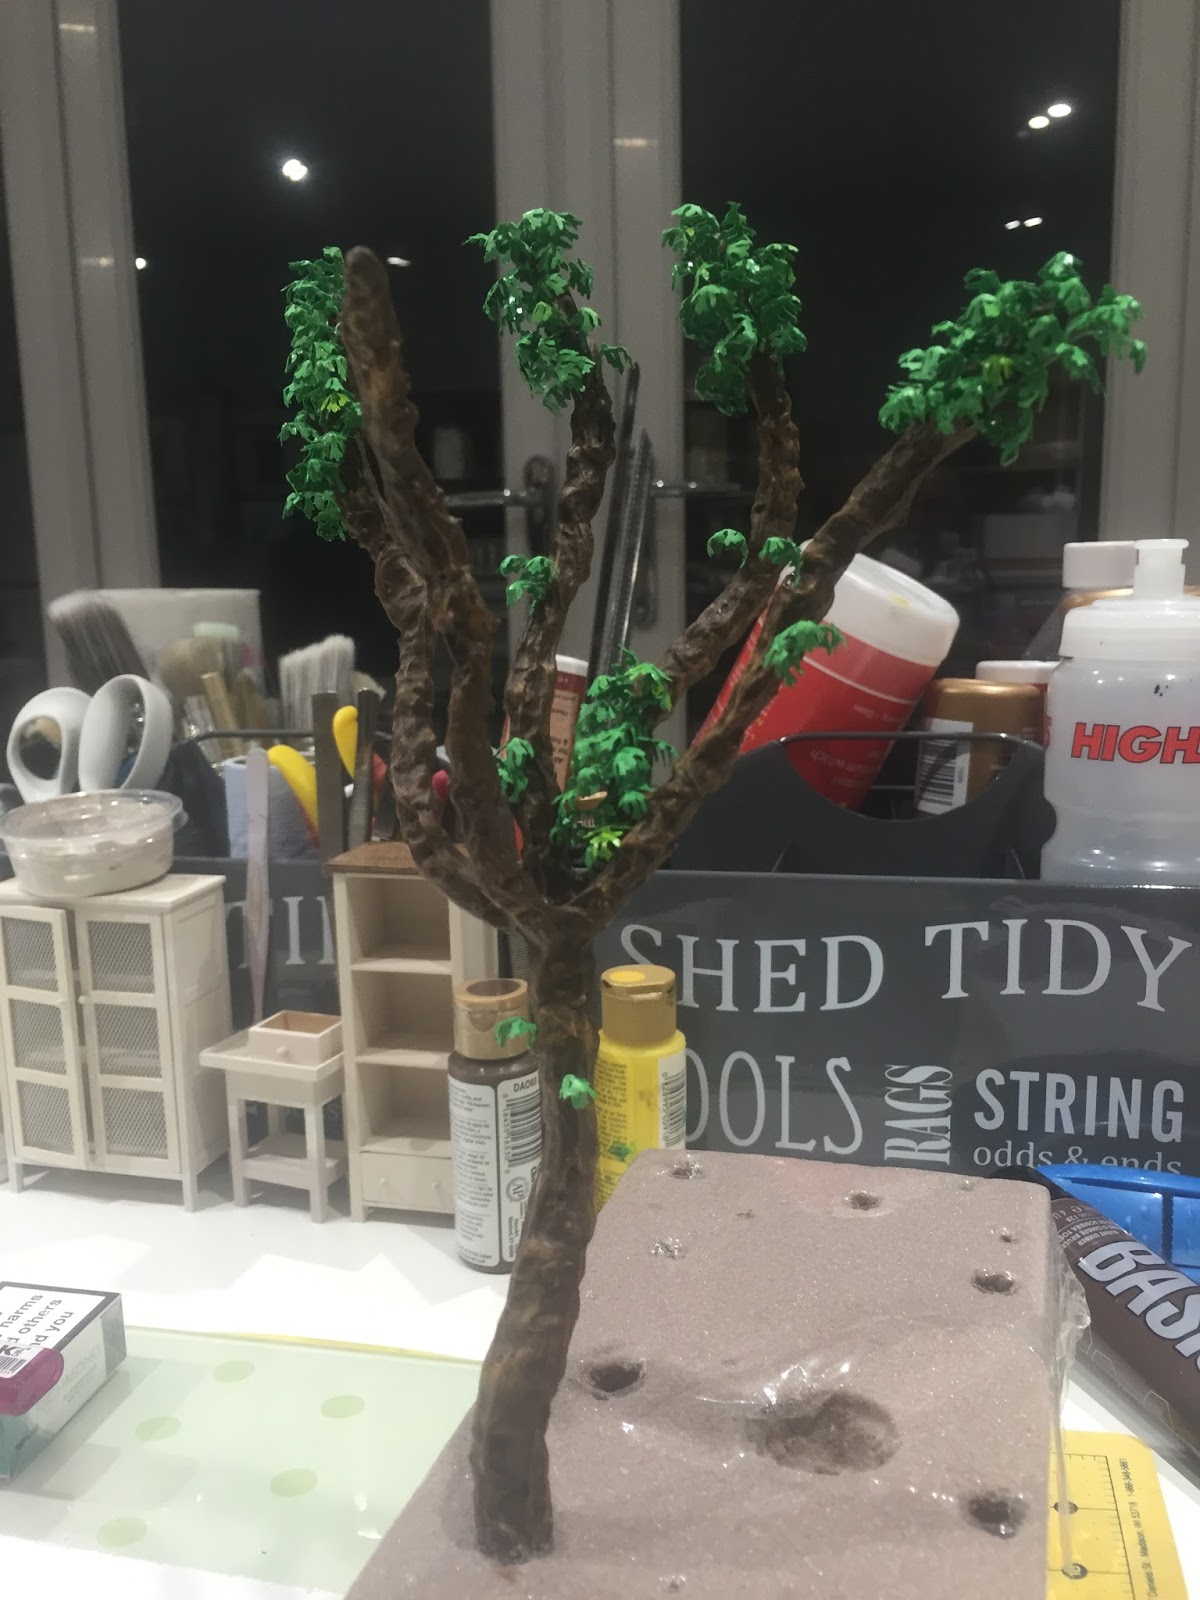
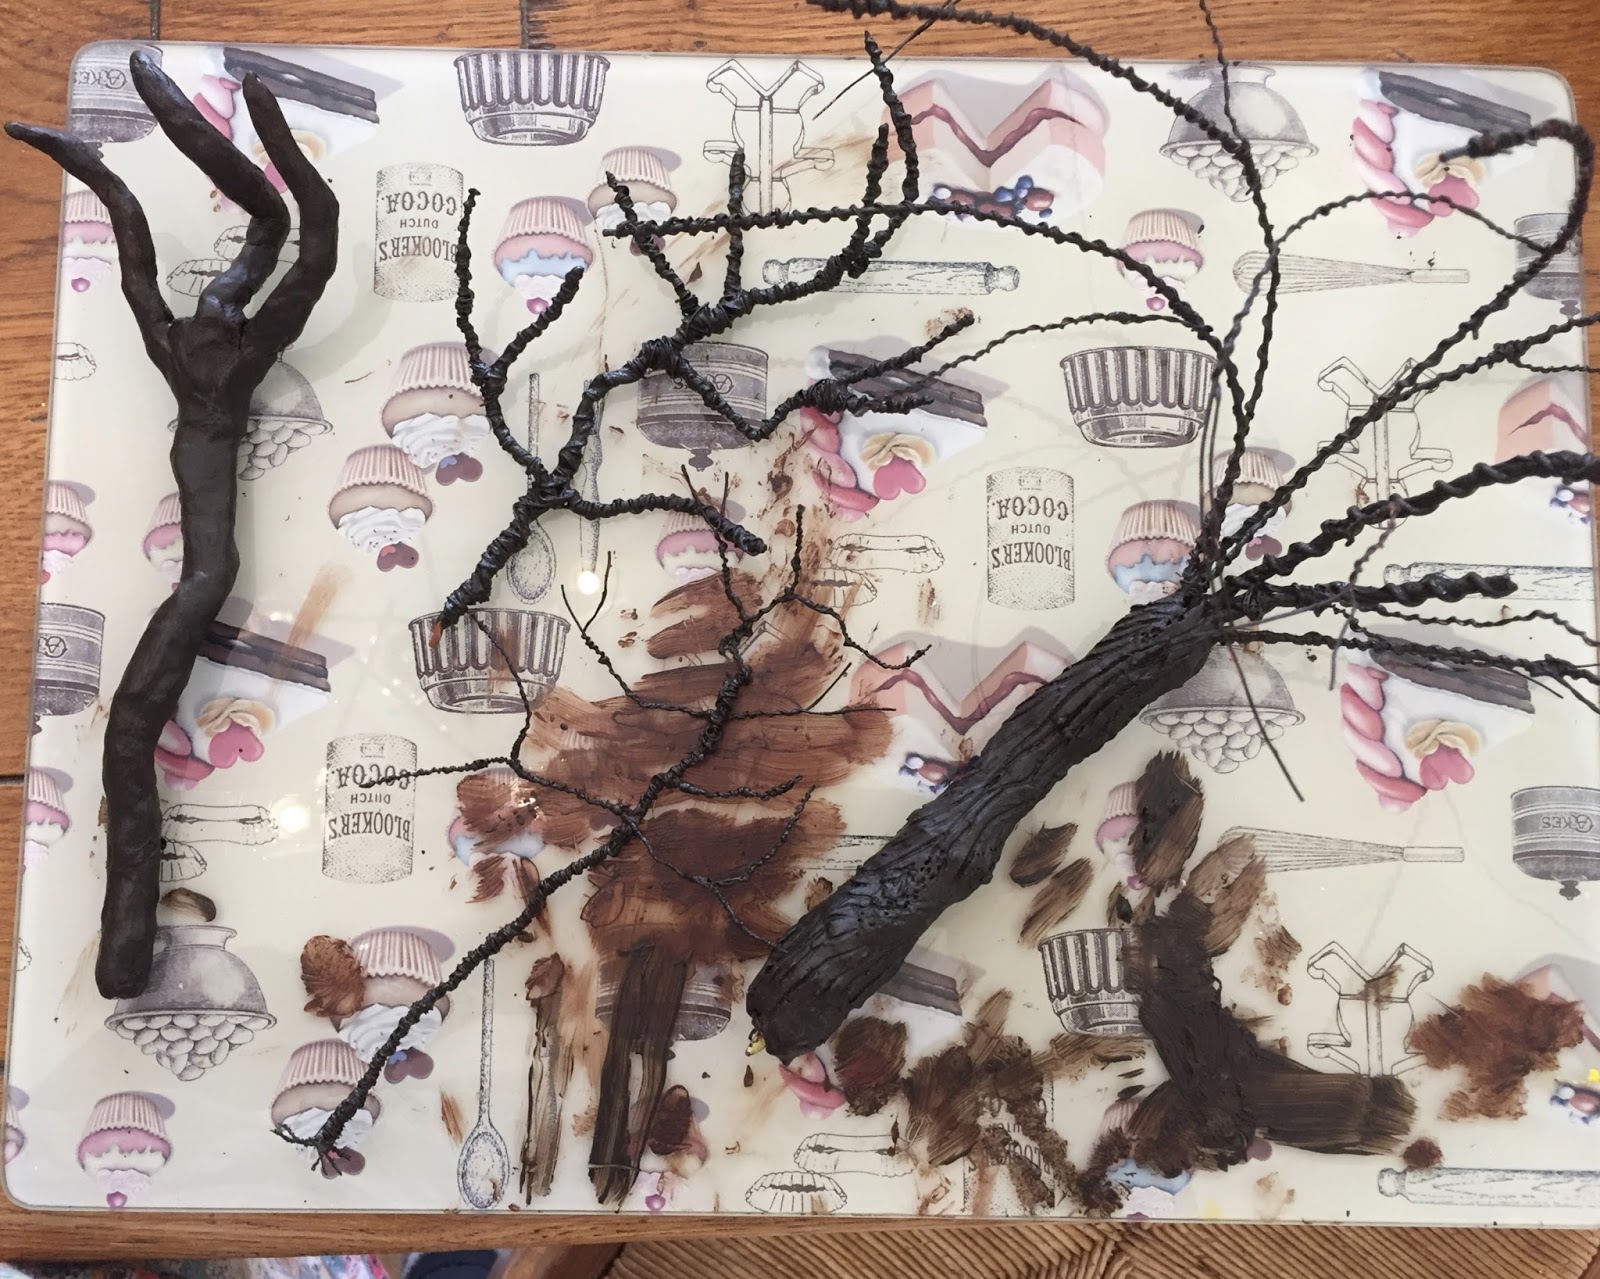
.....this monster. Which is my take on a weeping willow type tree for one of the back corners. A very heavily wired tree structure that I painted and then because I wasn't happy with the trunk I then covered with tissue and painted again.
 I then punched hundreds of leaves using the basic rice paper I mentioned in my last post that I bought on Ebay. I used a large leaf punch that I have had in my stash for a few years and didn't think I would ever use as the stem is much too big but then realised I could remove all the individual leaves from the stem and glue them on individually. 
This paper is very thin and I made the mistake of punching two or three sheets at a time which meant the leaves bunched together, much time was then spent with tweezers pulling the individual leaves apart. Advice to punch sheets separately ignored, lesson learnt.
As the paper is very delicate it then took me a while to work our how to score and cup the leaves without tearing them in half. I needed to do quite a large batch at a time to get into the swing, very tedious but much less wastage and frustration!
 Using my fine tipped glue applicator I dotted along each branch and began building up the leaf effect.
 Hopefully you can see the improved trunk and fully laden branches. It is also advisable to punch loads of leaves to make sure you do not run out and then find you can't remember what colour paint you used for this particular tree. I now have enough leaves for many trees and plants but as the saying goes: "They don't eat anything"!
 After advice from the lovely Jayne of Tallulah Belle Originals and ignoring the advice of Mary Kinolch I finally ordered rice paper and silk linen/Japanese Crepe from Pearce Miniatures
I have no idea why I didn't do this in the first place apart from the fact that I have been put off from ordering from the US lately because of the horrendous import and postal taxes I have had to pay in recent months. I think I had also become increasingly confused by the huge variety of papers that seemed to be more readily available. Patience has never been a strong point of mine.
Now, however, I knew exactly what to order and from where. The postal costs were very reasonable and for the first time in an age my parcel avoided scrutinage. 
 I started with the Silk Linen paper and read Era's very clear and helpful instruction regarding the colouring. This paper has a strong texture and was nowhere near as delicate as my Ebay rice paper.
I soaked it with plain water as advised and then coated it with an acrylic paint mixed with a dash of gloss medium. The paper gets very wet but as it dries you can see how you end up with a variegated effect which is just perfect for leaves. You do need to protect your floor though, if you want to, as the sheets will drip paint as they dry.
 Then, because I never can stick to instructions, I had a try with a 50/50 mix of acrylic and gloss medium and did not soak the paper. This has given a much deeper colour and the paint did not variegate very much at all.
 I then turned my attention to the rice paper from Pearce Miniatures. Again this was much less delicate than the Ebay paper and felt much nicer. I crumpled up these sheets and then painted each side in contrasting colours. I then dry washed each side with a strong contrasting colour. 
I have learnt that the dry wash colour has to be very clearly different to the base colour, if there is not a contrast when the tiny leaves are punched you lose the variegation completely.
 These sheets were not crumpled and you can see the different type of effect you get.
 I have now spent some time with my punches on these two papers and they punch like a dream. Of course I tried punching two sheets at a time but checked straight away to see if the leaves clumped, they did, so I punched each sheet separately which took longer but it meant I didn't have to spend much more time tweezing apart leaf clumps. You will get a lot of waste when using punches but this can be minimised by cutting off the strips you are left with in each row and then keeping these for cutting and shaping your own leaves......eventually!!
 The other thing I noticed is that the direction of the crepe weave will show up on the leaf. Here you can see the difference depending on which edge of the paper I punched along.
So far though these papers are so much better than all the others I have used so far and I wish I had used these from the very start. Their cost is very reasonable and I would certainly recommend them for anyone's stash or if you intend to embark on a plant project of any kind.
I think I have just about got away with the quilling paper because the leaves I started with were very large and I am sure I will use the leaves I already have on larger plants but I would not recommend using it for smaller plants and flowers. 
As you will have gathered I have quite a collection of leaves now that I began storing in the little Poundland containers I think everyone has in their stash but I then remembered I have these tiny food pots that I use for paint and glue. Much better for storing these tiny bits as it appears I am going to need quite a few containers for this project 
They are really handy and can be bought in all sorts of quantities and types Ebay, these are the same as the ones I use but there are others available too for less. Mine are more or less disposable as you cannot wash then out in very hot water, they will de-grade. 
Great for your letter to Santa though!!
A bit of a marathon post but I hope it will prove useful.
Try and keep dry this week if Winter is testing it's muscles where you are. If Summer is arriving in your part of the world........Lucky, lucky you!!

Friday 20 November 2015

Yep, still Making Trees But What Have I Learnt?

I was feeling a little down a few days ago with the general progress of this project and the usual dis-gruntlement of not having the right tools or equipment. Luckily one of my favourite plant miniaturists, Tallulah Belle, sent me a lovely message full of encouragement and excellent tips. 
Jayne's wonderfully humble advice gave me the kick up the back side I needed, how arrogant am I to believe I an learn in a month techniques and skills acquired by skilled artisans over many years? And then to sulk when things aren't perfect!! Definitely time to get over myself and back to grafting and learning!!
 I have made quite a few wire trees which because of their shape and style will require lots of very small leaves. I have found it very difficult to obtain mini craft punches in England but I found a few on Ebay including this rose leaf punch. As you can see it provides six small leaves with every punch in graduating sizes. so I sliced them all off and simply cupped them on my mice mat ready to glue on the branches.
 The gloss medium finish works much better on the smaller leaves as they don't look so glossy. As you san imagine this is quite a tedious process so following the adverts advice, "When the Fun Stops, Stop!", I completed this small tree over three sessions, two branches at a time.
 Breaking the sessions down proved really sensible and it is now completed. I decided to tissue cover the trunk of the tree and leave the lower branches bare.
The branches are a bit spindly and I am not too keen on how they come out of the trunk but........remember they are background and move on!!
 I moved on to rice paper. This is the type of paper most flower and plant artisans recommend but for some reason is incredibly hard to source in the UK. There are lots of specialist paper sites but I found the lists of rice and silk linen  papers quite incomprehensible so I ended up buying a set of paper on Ebay
I read somewhere that this paper is quite fine and can be very difficult to work with but can be stabilised with paints and mediums. I started by scrunching the paper up to add further texture. This time instead of adding the medium after painting I mixed it in with my acrylic colour. I used the gloss medium that when mixed directly with the acrylic paint added a more silk satin finish than a shiny gloss, much nicer. Adding the gloss medium to the paint made it much easier to apply too, another bonus. This rice paper is very delicate and can tear very easily. I painted mine on a glass baking mat and kept lifting it very careful to avoid it sticking, then hung it up to dry on my paper 'washing lines' with plastic household pegs that I knew wouldn't stick to the paper.
Once both sides had dried I added a contrasting, dry-brushed colour. This paper has it's own texture but as I had also crumpled it the dry-brushing also brought out the crumple creases.
So far I like the way this paper has dried out and it is definitely far easier to punch. I have tested a couple of leaves and they look like they will keep their shape quite nicely.
This tree was the pineapple tree that I covered in tissue and PVA. Much happier with this finish and it is now fully dressed. 
 I simply scored these larger fern type leaves down the middle and glued them on.
This is a larger punch I bought in the UK but after no luck in tracking down mini leaf punches I had to resort to purchasing them from the US. 
Luckily I found The Crafter's Toy Box who stock a very large range of Punch Bunch leaves and flower punches. They were incredibly helpful and friendly in arranging my overseas order which arrived in record time.
I am not sure why these punches are so hard to find in the UK, I am sure lots of miniaturists would buy a who;e range of them if they were readily available. 
 This is another wire tree I have covered up and then added a sprinkling of leaves.
 Lastly, I have dressed the last of the tall trunks with a garland of leaves that will have some flowers added to it for a bit of extra colour.
Feeling like I have made quite a bit of progress this week after my little hissy fit, thank you Jayne, and I hope to have a little play with the rice paper tomorrow. It seems we might get snow here in the morning but I will believe it when I see it!!
Have a wonderfully crafty weekend.

Thursday 12 November 2015

Oh My. Why Did I Ever Start This Tea Party Idea?

I have reached the stage of leafing the tree structures and have just realised that this stage is going to take me a lot longer than I anticipated.  Firstly there is the choice of paper and I seem to have chosen badly. My local resources are not brilliant so I have ordered sheets of rice paper from Ebay but they are yet to arrive. I have used mulberry papers from my stash but some of them are much too flimsy and the punches hate them. I bought a water colour pad from Hobbycraft that I thought would be thin enough but once painted this paper is proved heavy. 
Then I bought some quilling sheets from JJQuilling. These seem to be working and they come in a huge range of colours. I bought a swatch so I can make sure what colours are available for future reference. The sheet is the equivalent of four A4 sheets which work out at 20p each so really good value.
Making mistakes is not only a waste of money but such a time waster too. I painted, dry washed and added medium to a whole load of sheets that have now proved un-useable for the leaves although I may be able to use for hand cut leaves on the bushes and plants at a later date. 
I am also having second thoughts about using the gloss medium on one side of each sheet. It has made the leaves very shiny which is what I thought I wanted. I am worried about the room box being too dark and I thought that the shiny leaves would reflect light better. Now I am not so sure.......
 Anyway.......I began with one of the wire bushes and started adding the leaves in clusters, this is a very slow process.
 I have used my fine tipped glue pot from Templewood they stock a very good range of kits and accessories. I have also picked up this very handy tip in my research. You can dab glue onto the thumb of one hand and use this to dip each leaf in with your tweezers as you add single leaves.
These are the ivy leaves I am adding to one of the tree trunks.
 These are maple leaves that I have scattered on one of the thin trees. These are meant to look slightly older and less fully leaved. 
 The finished ivy trail has worked well. I tried to add a stem to the trunk but just couldn't get it to stick so I added them in pairs without a stem and you can't notice the lack at all.
 I have used punches for the leaves and here you can see where I have dry brushed to try and add some colour variation.
 I decided to shape the leaves as well. This is time consuming but it does make the leaves look more natural. You need to do this on a soft pad like a mouse mat so that the leaves cup and hold their shape. There are lots of shaping tools available my came from Templewood Miniatures but I think Poundland sell a set in their nail art section.
 Again I have added in clumps as well as an ivy growing from the ground. This tree is going in the back corner so I wanted it to be quite bright but I am not sure if this shade is a bit too vivid so they might be binned once I finish off the other trees. I am so indecisive about colour.
 This is one of the larger wire trees and I have added quite a few leaves to this one but it still looks a bit sparse in the photograph. I will wait for the glue to dry and then decide to add more.
 Last but not least another of the tall skinny trees.
So five down quite a few left to go!! I am starting to think about how I going to affix these structures into the flowers beds so I am thinking air drying clay mixed with PVA might be the answer I am a long way off that problem yet!

Wednesday 4 November 2015

Filling Up the Wood for the Mad Hatter.....Making Trees.

I know I am always saying this but I am always stunned by how long everything seems to take. Then I start thinking about all the artisans and artists who are constantly producing amazing items in their Etsy shops or for shows. How do they do it? I know I am a home crafter and slow but goodness they must put so much time in to even the smallest pieces and then people come along to their stand and raise their eyebrows at a plant for £20. How soul destroying that must be.
So......I have made lots of wire trees in a variety of sizes.
 Then I came across a tutorial on the Lead Adventure Forum which I assume is for collectors of lead soldiers which uses tissue for wrapping frameworks, so of course I had to try this method.
 Really simple, just apply any old tissue with lots of PVA glue.
 I decided to have a go with my 'pineapple' tree because I really don't like the way this trunk has turned out. Now it needs to be left alone to dry at least overnight.
I have had a play in the room box to check the heights as I have gone along and to see how many I will actually need. I am always a bit gung ho when doing something new and cannot resist trying out loads of different methods with various items I have hoarded over the years. This might be a reason my projects take so much longer than I anticipate.
 Plus I have to keep telling myself that the trees are background so they don't all have to be individual masterpieces. I read a great series on painting and finishing trees on the blog Needle and Clay where the artist gives some really good advice about colour choices and mixes so I decided to use Burnt Umber as my theme colour for my wood. I have painted some with a straight Burnt Umber base, some with a Burnt Umber/Black base and some with a Burnt Umber/Yellow base. The idea being that you start with your darkest colour and then add lighter mixes by dry brushing over these base colours.
 Dry brushing should high light all the ridges and shapes of the trees and bring them to life.
 Painting all the trees was quite time consuming, especially the wire ones, and you must let all the coats dry before attempting any dry brushing so there is a lot of waiting time.
 These are all my air drying clay trunks. I have to say that the Creative PaperClay worked much better than the much cheaper Hobbycraft clay. There was no cracking and it went on much better.
After the base coat I then mixed the Burnt Umber with various amount of yellow and started dry brushing.
 This is quite a hard technique I think as you have to be so restrained and trust the method to work. It's very hard to believe that using a brush with all the paint wiped off will actually work.
 Somehow it actually does and all my trunks have come up really well.
 This picture has come up a bit dark but I think I have done enough now. They will have leaves added which will make some of them spread out more. A couple are too tall but I simply snipped of their tops to make them fit.
 I think there will be enough variation of colour and they won't be too dark. I intend to have a few LED light strips in the flower beds that should brighten up any dark corners.
 I haven't added any scenic moss or green moss paint to the trees yet I will wait until planting to do the finishing touches.
Today I have begun punching leaves. My that is a task and a half!! I have a very bruised palm this evening. I started with various Mulberry papers I had in my stash but the punches did not like them at all. So I added different colour paint layers to the sheets.
The green sheets that I was hoping to use are much too dark and pretty one dimensional. It appears you need a mixed variety of leaves otherwise the leaves just disappear into each other. I decided to give the paper a coat of gel medium too, one side gloss and one side matt. I am hoping that the mediums will give the papers more body so I will be able to use the leaf punches I have been collecting. I have absolutely no idea if this is the best thing to do but I suppose I will find out tomorrow!
There seems to be a whole variety of views as to what is the best type of paper to use for miniature plants so I have ordered a couple of types that I will paint myself plus I will try printer paper as seen on Otterine's Miniatures
Glad to be moving on to new things now and learning new things all the time.
Which is just as well as the weather is awful!!