After lots of very useful advice and much encouragement from fellow bloggers I have had a go at making the leaded windows for The Leaky Cauldron.
I read lots of very helpful tutorials on the subject including Glenda's, who shows how to make all sorts of shaped windows using cotton thread. This is a fabulous tutorial creating very delicate frames. I was also directed to a wonderful blog by Victoria which showed how to use lead strips but I can't find the link anywhere. Lots of bloggers suggested using golf lead tape as a cheap and readily available resource.
 Now I do like a quick fix and with this in mind I bought this product from Hobbyland that I thought was going to be the answer to my prayers. It is meant for creating stained glass for crafting.
I drew out two different designs and cut out the acetate. To prevent the acetate from slipping I used a little bit of double-sided sticky tape.
The idea is you simply draw on nice lines allow the Cerne Relief to dry and you have a leaded effect ready for glass paint.
 Well all I can say is I tried......It was all a bit to blobby for me. You have to have a very steady hand and keep a fine flow of the Cerne otherwise it is either too thick or too thin or there are air bubbles.
Plus it takes time to dry.
 Complete disaster!! But I did use the best panel to try out different colours of glass paint. Always the optimist.
My next attempt involved the use of lead strip. I didn't buy golfer's lead because I saw a roll of sticky lead in a craft shop, again for stained glass work, which looked much the same thing and was about the same sort of price.
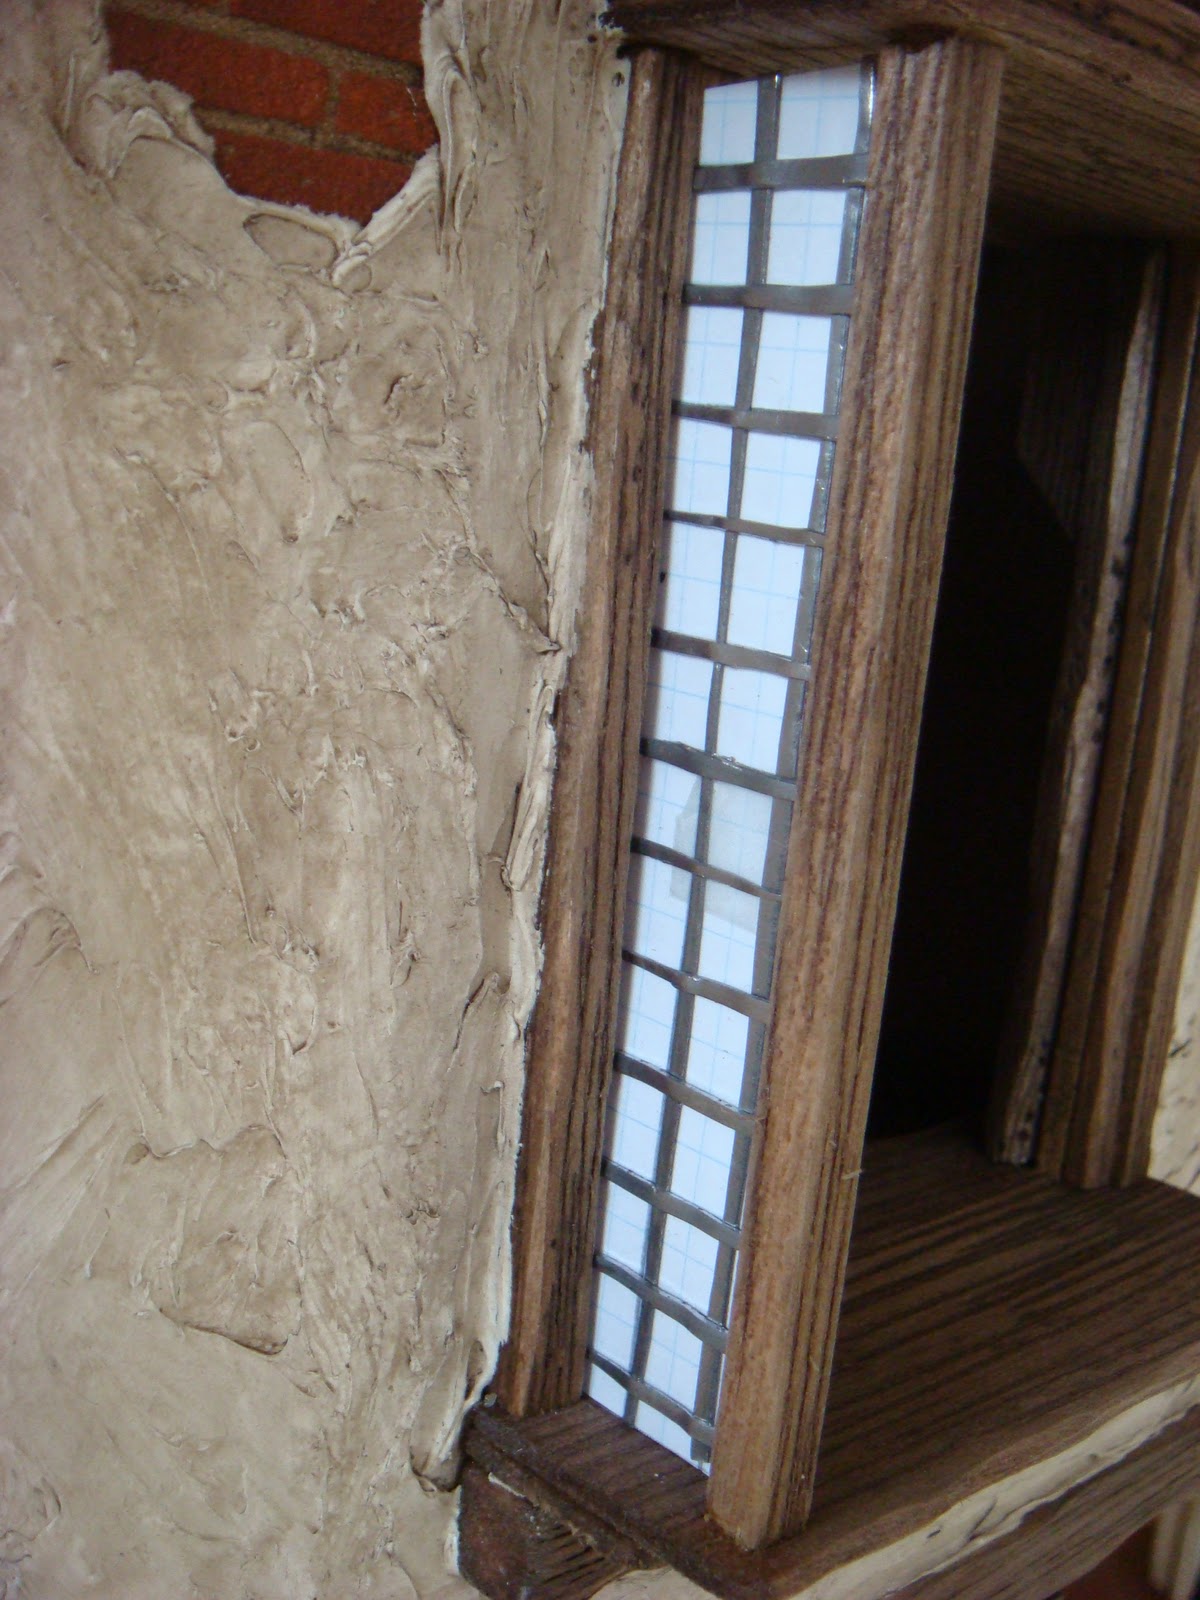
 As you can see the roll is huge, I have enough lead now for all my houses!! Same process as before with the graph paper, then I cut thin strips of the of the lead ready to stick to the acetate.
It was very easy to cut I only used normal scissors. I cut free hand and trimmed down to size.
 First one complete!! The strips are not all the same size and may not all be straight but they add character!! I will remove the graph paper after I have aged the lead a bit.
 This is the design I chose for the larger windows as I still want to be able to see inside the main house after the leading, the aging and the glass painting.
I have ordered some Liver of Sulphur Gel which apparently oxidises metal. I just hope they don't disintegrate on me!
Put in a good shift today and just have the bottom window left to finish, whoo hoo!
I started by cutting individual templates for all the window panes on graph paper. Sounds easy but as all the windows are a different size and definitely not regular shapes. Took a bit longer than I expected!

I drew out two different designs and cut out the acetate. To prevent the acetate from slipping I used a little bit of double-sided sticky tape.
The idea is you simply draw on nice lines allow the Cerne Relief to dry and you have a leaded effect ready for glass paint.

Plus it takes time to dry.

My next attempt involved the use of lead strip. I didn't buy golfer's lead because I saw a roll of sticky lead in a craft shop, again for stained glass work, which looked much the same thing and was about the same sort of price.

It was very easy to cut I only used normal scissors. I cut free hand and trimmed down to size.

I have ordered some Liver of Sulphur Gel which apparently oxidises metal. I just hope they don't disintegrate on me!
Put in a good shift today and just have the bottom window left to finish, whoo hoo!
Cor you do challenge yourself dont you Janice, good for you though!! I hope the oxidising works and dosnt spoil all your hard work. Its not cheap either trying out all these different methods, thats what costs so much , exprimenting, but it will be worth it! Kate xx
ReplyDeleteHi Kate, the lead roll was a real find. I will be able to use it for all my lead flashing that I have been putting off because the rolls I have seen on dolls house sites is so pricey.
ReplyDeleteI am a terrible one for craft products but I am determined to try and use what I have been collecting together but I never seem to have the right stuff for the next job!!
Hey ho!!
Experimenting is a must do and it's great to see you trying all sorts, even at a cost! lol :o))
ReplyDeleteI haven't tried the golf tape method, it's a lot of work, you have to get the lines even and straight and I'm not sure I want to do all that effort that might not work. :o( If the liver of sulpher gel doesn't work (I'm most interested in this!!) you can always lightly paint over the lead stuff with black enamel paint and remove most of it before it dries.
I agree the black stuff is too thick. I know Julia used AQUA glass relief outliner which looks just like lead and it's very thin/fine looking. I like this look a lot. To steady your hand can you not have a wedge which to lean the bottom of tube against as you run along your lines and if you work right to left (with the wedge on the left) you'd be able to do all the rows in one go.
I've bought Richard Stacey's lead for the flat roof for Slug and Jiggers, I know it's not cheap but I love the look. I've also bought other supplies for S&J too. :o))
Looking forward to your next post and the galvanised look!
Michelle xx
See... Your hard work paid off! It looks Great! Can't wait to see them when you get them aged:)
ReplyDeleteLOL Janice, have you read how dangerous Liver of Sulphur is?! I most definitely won't be trying it, they'd be carting me off in a box if I did! lol
ReplyDeleteBe careful and use it outside, etc.
Michelle xx
Hi Michelle, am going to email tomorrow but just so you don't worry about me being too much of a mad scientist the stuff I am using is no more unsafe than normal household projects. There are no inhalation issues and it is used in diluted form.
ReplyDeleteI saw some products which seemed lethal but this one is perfectly safe!
http://www.xlgel.net/Instructions.html
Thank you for thinking of me honey.
Janice the windows are going to be perfect! I have some of that liquid stuff, I ruined a window with it too. I think you could age them with paint too if you don't like the look like Michelle said. The lead looks great!
ReplyDeleteVictoria ♥
They are looking wonderful! :)
ReplyDeleteHi Victoria, I think some practice beforehand is a definite! I actually bought it for lead roofing and other metal pieces but now I have started the windows I thought it would do for them too.
ReplyDeleteThanks Dale, they have actually come out better than I hoped and are quite easy to achieve just very time consuming.
The windows look great, can't wait to see them all finished up! I'm interested to see how the aging turns out, too.
ReplyDelete- Grace
I am going to add this post to the list on lead windows. Thanks for sharing, Janice!
ReplyDeleteThat looks very cool! I can't wait to see the finished window after you have aged it.
ReplyDeleteWell done Janice. The windows look good even although you had to go through the other steps to get there. It was worth it in the end. I'm looking forward to seeing them in situ and all painted.
ReplyDeleteYour leaded windows look really great. I have used thi method before but not managed to age them so it will be interesting to see how the Liver of Sulphur works out. I never thought to use graph paper as a background to keep the lines straight. Will be doing that idea in future.
ReplyDeleteThanks for the great tips
Thanks for posting your progress on the windows, my poor hobbit hole is wanting some leaded windows and i just might try this!!
ReplyDeleteLooking Great, love your pictures!!
Jenn
Hi Natalie, can't take the credit for the graph paper, I got the idea from Glenda's tutorial and I think lots of other sites show the grids for pattern making.
ReplyDeleteIt sure does help though!
je ne connais pas la bande de plomb , merci pour les expériences .J'utilise souvent de l'aluminium fin comme les barquettes d'aluminium pour les aliments , il se coupe facilement au cutter et c'est assez droit.
ReplyDelete