I have decided to only have false internal doors in Diagon Alley as the kits I have chosen are simply too small for stairs in any form. So I trawled Michelle's Blog to find the fabulous posts she has written describing using balsa for making doors and how to get obtain distressed paint effects. Michelle's blog is a mine of information regarding techniques and materials and she is very generous with her advice.
What is really good about Michelle is that she is always willing to share her mistakes so that others don't go down the wrong path.
I had a good read and have started with these.....
 ....made from sheet balsa. The doors are not individual planks but all one piece that I have marked out using large darning needles. The door surrounds have been cut separately and then glued on top. I have yet to add the grain and worm holes. One is a little too tall, but can be cut down, and the other is a little too quirky but I am quite pleased with this first attempt.
I will now follow Michelle's example and make a couple using separated balsa planks with my new delivery of balsa sheets that arrived yesterday from BalsaMart. I also bought a new tool from them for cutting. It's called a Razor saw and I wish I had known of this type of tool ages ago. It's perfect for cutting balsa from all angles and it is a hand saw rather than the type with a handle. So easy to use and the wood cuts cleanly.
 When I was drooling over Sab's wonderful new house and reading through various posts, the product "gesso" was mentioned as a medium for finishing. Sab said it was a great way to cover walls so when I was doing my weekly Hobbyland browse I saw these two products and brought them home to try out.
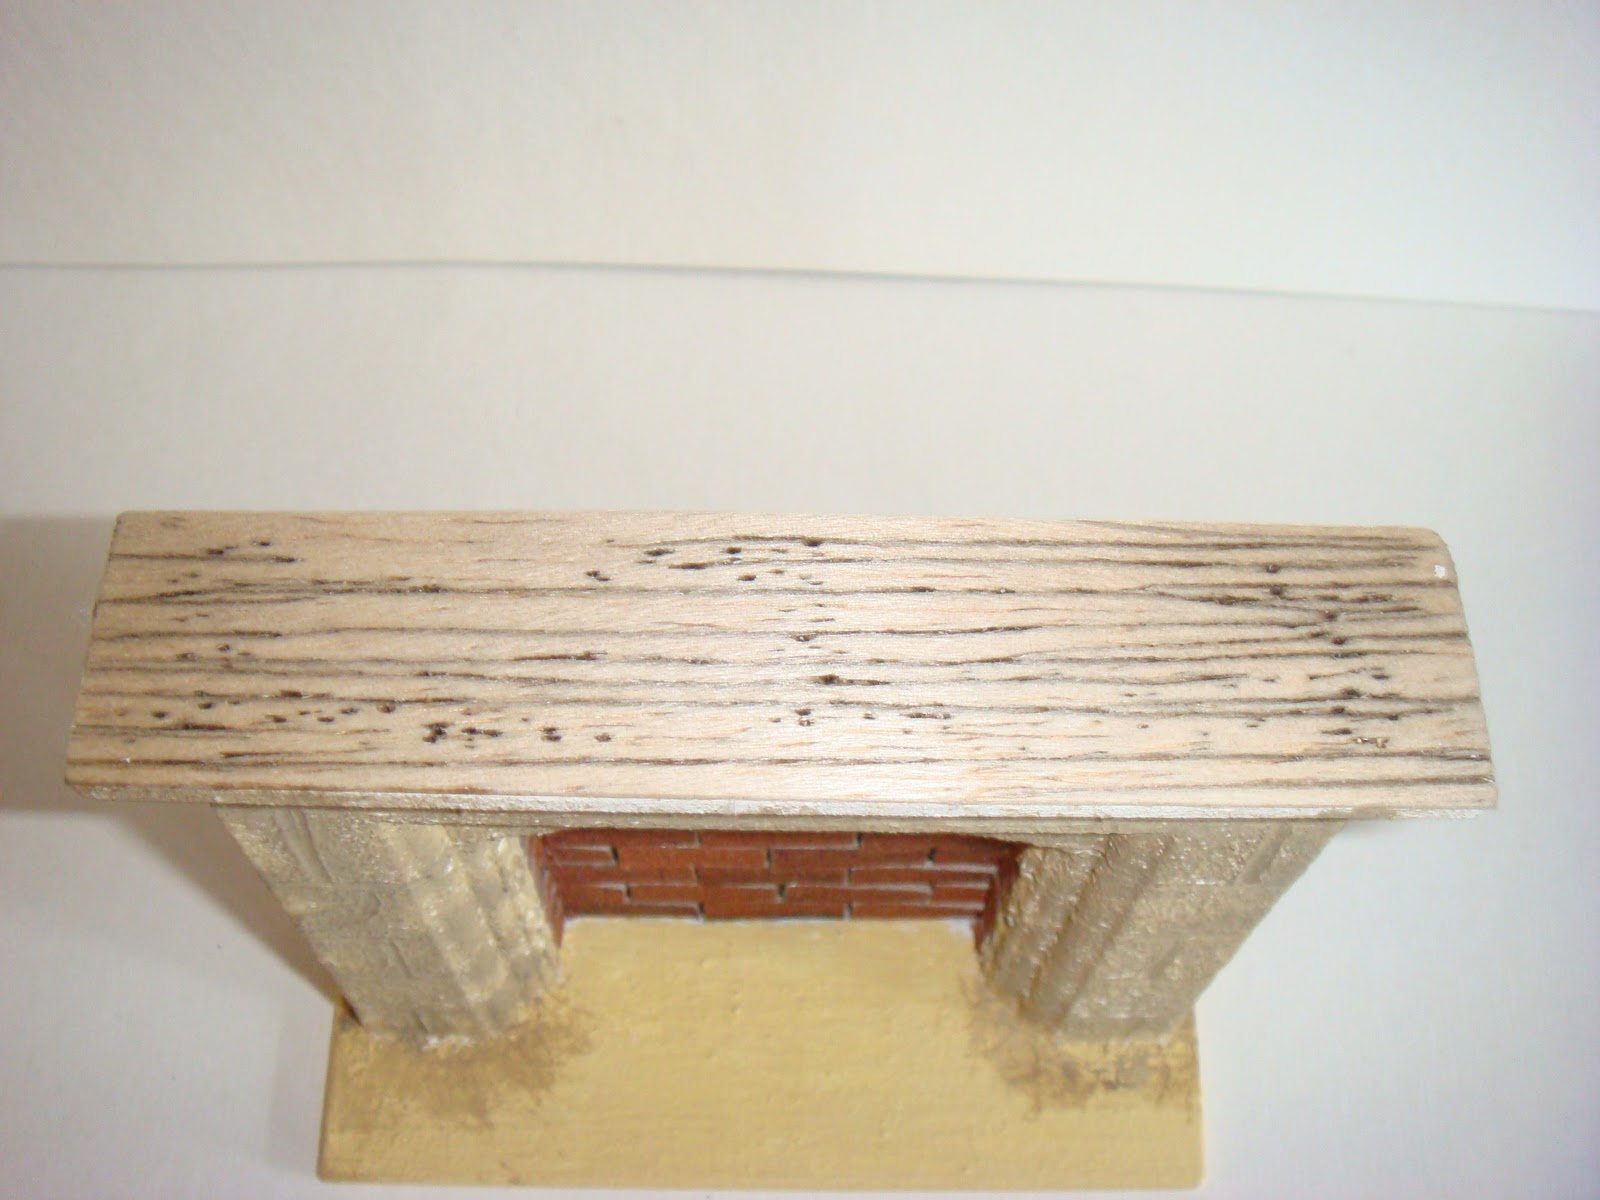
I thought I would trial them on this fireplace I bought from Ashwood Designs
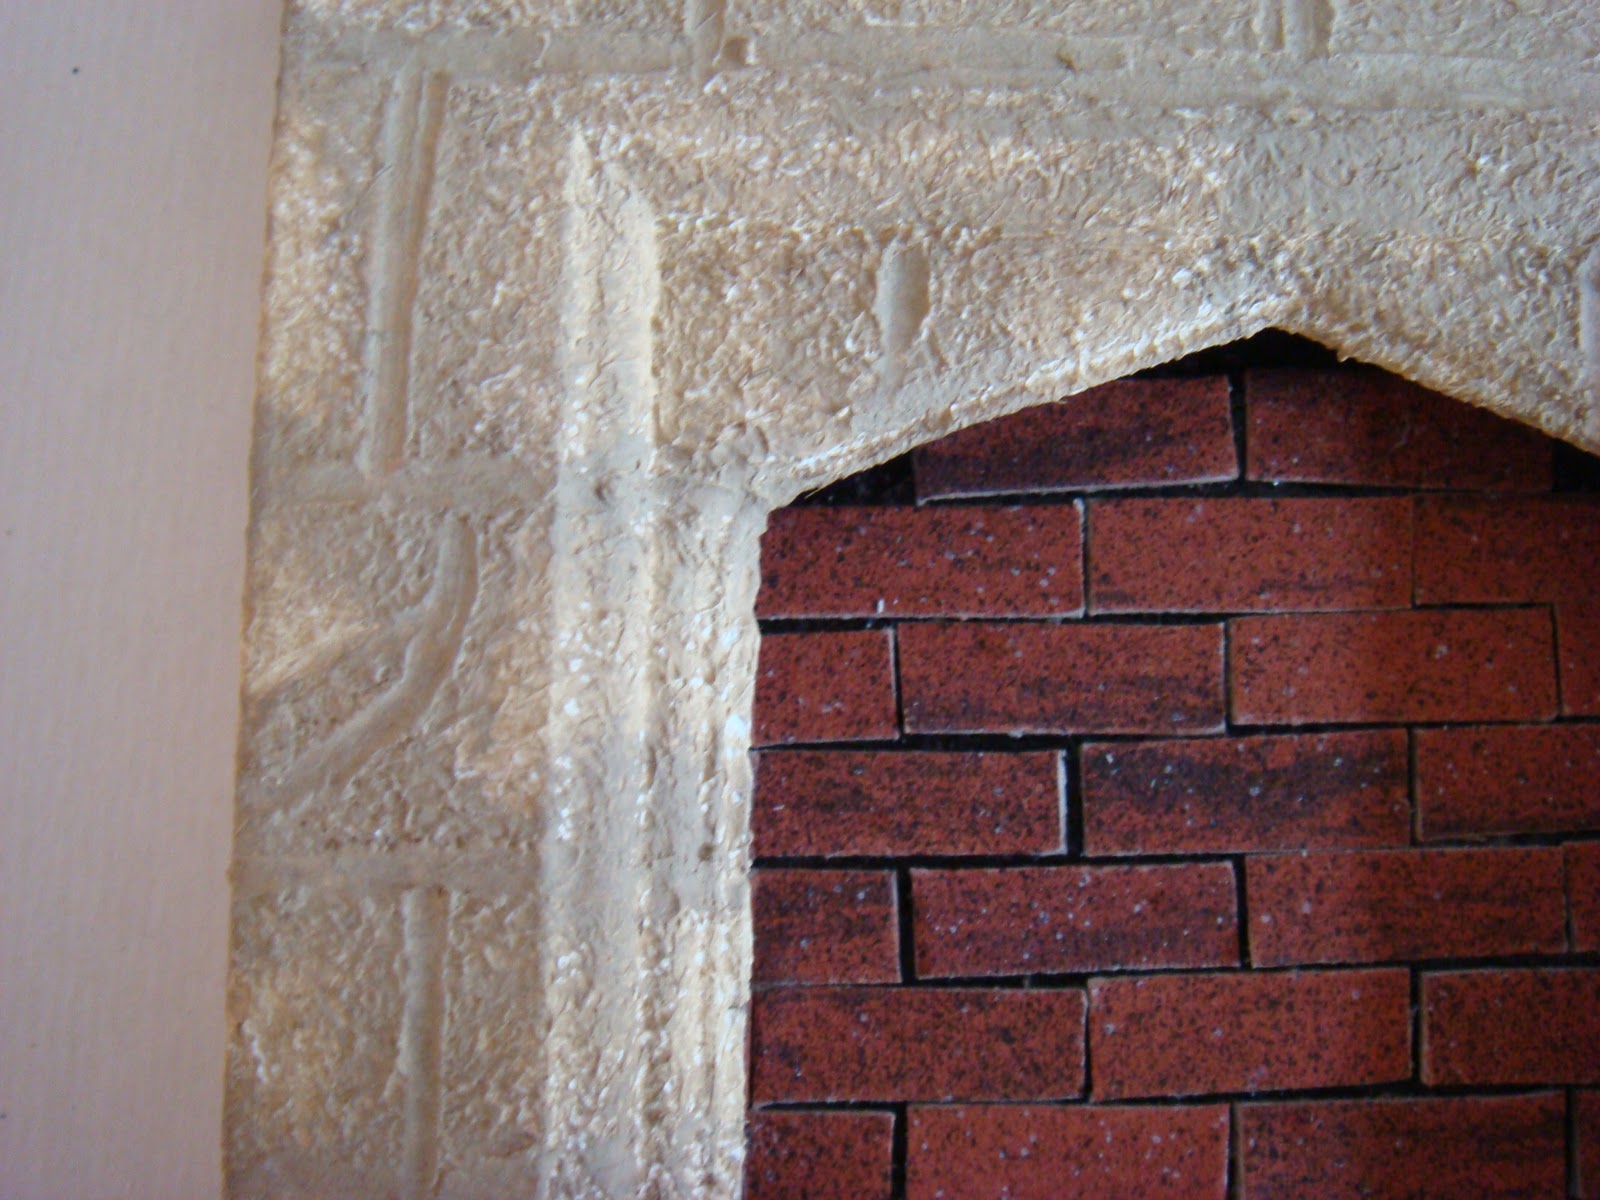
 I used the Textures paste to try and create a sandstone effect and then before it dried I drew in the stone lines. I have then added a couple of paint washes over the paste. The paste went on very easily and you do not have to use very much at all. It is easy to mess with too, making it like a stucco or stippling.
 Paint washes are still a bit hit and miss for me. I find it hard not to simply end up with a patchwork of colours rather than blending them together. So far this is two coats and it looks a bit like desert camouflage but I hope it will improve!


I have bricked the chimney and hearth using Peter Clark's brick cards,which you cut out yourself, and the mantle will be 'oak'.
 Again this is distressed balsa and I will add sides to make it look like a proper oak timber. Still a way to go but it has turned out better than some of my previous efforts!
 I have also finished the slate floor and I am really pleased with my first attempts at grouting. I have always been put off using 'real' bricks and slate because of the grouting you have to do to finish them off properly but it was much easier than I had expected. Messy, yes but not difficult. I used normal DIY powder floor grout that I found in the garage, probably left by previous owners because I can't remember us ever using it! it mixed up well and then I simply pasted it over the tiles and wiped off. And wiped off. And wiped off!!!
 I didn't worry too much about the tiles not going right up to the sides as there will be skirting board and furniture to add which will cover the grout next to the walls.
 I have also received a package from Tony Hooper who makes the most marvellous metal work and accessories. I have chosen some from his black cast iron range. They have lovely details and look really solid. I especially like the little lock with a false key which is a great finishing touch.
 And this little pile is what will be keeping me busy for the next week! The wall and ceiling beams, and all the interior skirtings. I cut them all out and they will now have to be distressed and stained. Really time consuming but hopefully worth it. As these rooms are quite small I have gone for much thinner beams than I have used before, giving the idea that the beams are buried within the walls.
I am also going to try out some LED lighting within this project which I hope to hide behind the ceiling beams. That will be a challenge as I have never found lighting houses very easy to do. The 'Must Do' list keeps growing as usual so I had better get on with something!
Have a creative Sunday!

I will now follow Michelle's example and make a couple using separated balsa planks with my new delivery of balsa sheets that arrived yesterday from BalsaMart. I also bought a new tool from them for cutting. It's called a Razor saw and I wish I had known of this type of tool ages ago. It's perfect for cutting balsa from all angles and it is a hand saw rather than the type with a handle. So easy to use and the wood cuts cleanly.

I thought I would trial them on this fireplace I bought from Ashwood Designs


I have bricked the chimney and hearth using Peter Clark's brick cards,which you cut out yourself, and the mantle will be 'oak'.


I am also going to try out some LED lighting within this project which I hope to hide behind the ceiling beams. That will be a challenge as I have never found lighting houses very easy to do. The 'Must Do' list keeps growing as usual so I had better get on with something!
Have a creative Sunday!
Janice your doors look great! So glad you discovered the razor saw, one of my favorite tools. i really like the texture paste you are using, the fireplace looks good. Your slate floor is perfect and the little hardware you found is awesome. I can't wait to see your progress.
ReplyDeleteVictoria ♥
I am in love with my new saw Victoria. It makes everything so much easier. The balsa does not split and break and my patience stays intact too!
ReplyDeleteYou are doing a grand job!! It's great to experiment too! I love the fireplace and that paste looks great. If you are worried about getting the wrong colour for stone you would be able to apply a couple of coats of Richard Stacey's modelling dusts. They are 100% natural and thus already the right colour.
ReplyDeleteThe slate floor looks fabulous, and I hate grouting too. I used R Stacey's one. You have to be so quick to wipe the remainder off before it dries! lol
I've used all of T Hooper's hardware for Hogwarts and some on my witch's house too, he does a great selection and I was extremely pleased with mine.
I wished I'd mentioned the razor saw to you, maybe I thought I had. I've had one for ages and they are prefect for fine woods etc.
I can't wait to see the LED's as this is something I'd like to try.
My must do list is endless too, I wish we had a 50 hour day! lol
Thank you too for your kind words...I hasten to add I make more mistakes than anything else! lol
Michelle xx
Hi Michelle, I do like the sound of the modelling dusts and you have already made good use of them.
ReplyDeleteYou probably had mentioned the saw but I was making do at that stage. Now I have a lot of balsa work to do again I knew there had to be a better way!
Love Tony Hopper's pieces. He has a lovely set of scales I have my eyes on too.
thanks for your lovely comments on my blog!
ReplyDeleteYour fireplace is so realistic, many congratulations! I'm curious to see the light inside, it will be so warm ....
I love the black floor, too!
Caterina
Great post! I love to see how others make stuff and try out different materials and products. Although we often don't get as many products here in Holland as you guys do, some things like gesso are universally available.
ReplyDeleteI like the stone effect you achieved on the fireplace and look forward to seeing what you do with the doors. ~Josje~
You're getting on with this really well - progress looks fab. I've just received a Tony Hooper parcel as well - his work is just so fine and details. I'll certainly be going back there again.
ReplyDeleteI'm also interested to see how you get on with the LED lights, so lots of pictures please!
Have to get me on of those saws then Janice, Im trying to make balsa shelves right now and it splits terribly so maybe Im using the wrong method using a craft knife/ stanley! That gesso looks good, is it pricey, as Sabihas house looks beautiful but i imagine to do something big would cost abit. Love the flooring! Have fun with all those beams! Kate xx
ReplyDeleteThanks ladies, I do like the texture paste and the gesso does seem to provide a really good key, making applying the paint or paste really effortless. I had never heard of it before.
ReplyDeleteWill post lots about the lights as I think they could be the answer to all my lighting woes!
Hi Kate,
ReplyDeleteKate the pots were about £8 each, there were much larger pots for about £15 but I decided to try them out first. So they are not cheap but I hardly used any on the fireplace and achieved a light texture all over. I am going to use the paste on the outside of the Cauldron as the rendering I think so we should be able to gauge how far it goes. It will certainly be much easier and far less messy than polyfilla or paperclay.
Do buy a saw. Like you I have been using a stanley knife, or scissors or some awful saw in the shape of a 'D', useless! Wish I had bought one ages ago and saved the money I kept spending on new saw blades.
This looks fab Janice, really love the doors,what a fab first attempt !! I love to use texture paste and the fireplace is looking good so far. The floor is looking great too ,all in all youre doing a grand job !
ReplyDeletejulie xx
Janice, Love the Slate Floor, I'd love that full size on my Kitchen Floor. I quite like your quirky doors. Good Luck with all those beams..xxx
ReplyDeleteJanice , forgot to ask two things. Do you know if you need to primer the walls prior to using the gesso? thinking of using it for the interior of emilys castle walls to look like rendering. Also where do you get Peters card bricks from? only shows? Thinking of going to KDF in May does he go thee do you know as Minitura is too far for me. thankyou in advance! Kate xx
ReplyDeleteHi Kate, I used the gesso primer before applying the texture paste simply because I was trying it out so I don't know if you would need a proper primer for the paste.
ReplyDeleteEssentially it's for use on canvases I think and I just sort of stippled it on like a thick paint. I would think any primer would be fine.....
Sans mixes the gesso primer with fine sand to create her stucco effect which I haven't tried yet.
Peter certainly does Miniatura but I have never seen him at Kensington. His cards are really good value and are all marked ready for cutting to size. They can be easily cut with scissors and have a texture too which I think is created with fine sand.
I am going to Miniatura would you like me to pick up some colour samples for you? Also I have the bricks, as per the fireplace, and some roof slates in grey. I could send you some of these so you can get an idea of what they are like. He is always happy to post the cards too, in fact he only lives about 15 minutes from me!
I have also used them for flat roofs to good effect. Of course you do have the cardboard edges but I simply run a dry brush over any edges I particularly don't like and they look fine.
Oh and I normally paint behind the brick/slate in the colour of the 'grout', in fact the grey cards might be a very quick and easy answer to your castle walls!!
Janice thankyou, id love it if you could pick me up some samples. I was actually thinking that, how easy it would be if he did large castle type cards, what a great lot of work and stress that would relieve lol!! Theres so many ways to do things arnt there, so much to try, do I do, polyfilla, art mache, gesso.......too many ways to choose from, wish Michelle lived down the road from us both eh to do all the techniques and painting tee hee! Like you, its the filling of a project with all the minis I love the best, Im not too sure about all the painting and texturing and waste so much time trying to get the right effects. have to say though, yours have come up a treat so all your perserverance has paid off! Kate xxx
ReplyDelete