I will still be planting.......
I began yesterday by picking a selection of flower stems. I use a dry oasis from Hobbycraft to hold flower stems as I work. A large block is £1 and I cut it in half, they do shed oasis dust but hold the stems in place very nicely.
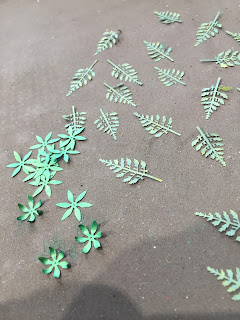
 Having decided what flowers I am going to group together in this portion I go back to each kit packet and work on the leaves. This usually includes a but of extra colouring and cupping or curling. I had expected that this stage would be completed in no time at all but as usual I completely underestimated how long it would take. The most important thing is to make sure the plants had different heights and depth of foliage.
 Getting height from the flowers led me to make my own foxglove/gladioli thingies which have actually turned out much better than I expected but were incredibly time consuming.
I started with what were supposed to represent unopened flowers at the top and then added rows of punched flowers glued into the same cupped circles and then finished with cupped geranium leaves that I had previously punched. I have used the same process for all the tall flowers.
They make not be real plants but this is Wonderland so I think I can get away with a bit of artistic licence!!


 Once I had added all the leaves I added a layer of air drying clay and began placing out the flower stems checking heights and depth. When I was happy with my choices I removed all the flowers and added in the tea leaf/PVA mix. Once this 'soil' was in place I replanted all the flowers including a small patch of tiny pink begonias around the tree trunk.
 On finishing the planting I realised I did not have any teeny tiny ground cover plants to fill in the front gaps beneath the medium sized plants. To avoid the super tidy flower bed look I need to make sure that the edges are broken up by spreading plants and these need to be tiny like the begonias.
 This led to a bit of a mad rush using Mary's laser sheets yet again. These sheets are such good value providing many pre-cut flower shapes and I quickly prepared the wire, added the flower heads from the quarter scale sheets and finished off with some leaves. I had to hurry because the 'soil' mix hardens off pretty quickly and I didn't want it to set and not be able to sink the wires.
In this section I have used: Pink Begonias by Bonnie Lavish, then from the back, my own yellow tall flowers, orange lilies, white roses, blue hydrangeas, pink fuchsias and pink carnations all by Bonnie Lavish. The 'lavender' plants have been made from FlowerSoft and punched leaves.

I began yesterday by picking a selection of flower stems. I use a dry oasis from Hobbycraft to hold flower stems as I work. A large block is £1 and I cut it in half, they do shed oasis dust but hold the stems in place very nicely.


I started with what were supposed to represent unopened flowers at the top and then added rows of punched flowers glued into the same cupped circles and then finished with cupped geranium leaves that I had previously punched. I have used the same process for all the tall flowers.
They make not be real plants but this is Wonderland so I think I can get away with a bit of artistic licence!!

Many of the kits I use start with the creation of a 'bud' at the top of the flower stem as can be seen here with the pink carnations. I think this is a way of hiding the wire stem and it prevents the additional petals from sliding off. The trouble is that you seem to end up with a big clump at the top with some of the plants and no matter how I tweak and crimp I can't seem to bring the other petals up to meet it.
I also noticed that even using this technique I never seemed to be able to completely hide the tip of the wire so I now dip all the wire tips in a matching paint colour which avoids this problem.
I lost the kit leaves for the carnations so I added some leaves from my tree stash. These are obviously not accurate but they add a bit more greenery than the proper leaves.

I made a little blossom bush to hide the LED strip light in the corner next the The Caterpillar using the tiny quarter scale flowers from Mary Kinolch and it seems to have done the job.


In this section I have used: Pink Begonias by Bonnie Lavish, then from the back, my own yellow tall flowers, orange lilies, white roses, blue hydrangeas, pink fuchsias and pink carnations all by Bonnie Lavish. The 'lavender' plants have been made from FlowerSoft and punched leaves.

Another section down and my flower stash is still looking quite healthy but next time I will make sure I have enough teeny plants ready for ground cover!
Looks fantastic xxx
ReplyDeleteThanks Debbie. Think I need a non-flowering project after this one!!
DeleteThese are absolutely exquisite.. I hope one day to be able to try ;) Beautiful x
ReplyDeleteMaking mini flowers is such fun Jasmine, especially if you only need one or two!!
DeleteSo beautiful! It may have taken longer than you planned, but the result is just stunning!!
ReplyDeleteI am really pleased with the look so far and fingers crossed!! A lot of hours but for once it might all come together as I imagined.
DeleteQue colorido,estás dando vida a la escena con esa variedad de flores tan bonitas!!!
ReplyDeleteBesos.
Gracias Pilar
DeleteHeel mooi
ReplyDeleteGroetjes Thea
Thank you Thea.
DeleteYou've made such a lovely job. Flowers do take so long to make, I'm guilty of giving up and using just a few in a vase. You must have such a lot of patience for such a repetative job! Before you dip your wire ends in paint, try dipping them in white glue, let it dry, then dip in the paint. You get a nice little 'bud' shape on the end which helps fill the middle of the flower. Gill x
ReplyDeleteGreat tip Gill. This is exactly what I need to do and have only managed it a few times with really gloopy paint. I do like making plants and this project has taught me a lot but I think I will be having a floral rest for a while after this lot!!
DeleteHello Janice,
ReplyDeleteSo much work but worth every minute! The flowers are all gorgeous and beautifully made...very realistic in the pictures.
Big hug
Giac
Hi Giac,
DeleteI have been lucky with the flowers are they are groups so I have been able to get away with a few horrors. Kits are great for producing lots of flowers for a project like this and they do give you the confidence to play around with your own ideas.
Mini hugs,
Janice
Hi Giac,
DeleteI have been lucky with the flowers are they are groups so I have been able to get away with a few horrors. Kits are great for producing lots of flowers for a project like this and they do give you the confidence to play around with your own ideas.
Mini hugs,
Janice
Hi Janice, You have been busy indeed creating your summer garden. It is more work than one imagines but well worth the effort and will give you pleasure for such a long time.
ReplyDeleteI wondered if you had looked in at StudioEMiniatures blog.
Elizabeth is a close friend but I thought her tutorial on her garden for Green Dolphin Street - particularly the moss and tiny flowers (perhaps a representation of Irish Moss) may help you soften edges if you so desire.
Great to visit. Thank you,
Regards Janine
Hi Janine, I have studied Elizabeth's garden very carefully and have bought some moss exactly for this job. Once I have the main beds in I intend to soften the edges even more using her techniques in an attempt to make the grass area look less like a formal lawn. Elizabeth's garden is fantastic a real inspiration. I am so glad you reminded me of her site as I must give her a proper mention.
DeleteRegards, Janice
Beautiful Janice! So much colour and life.
ReplyDeleteWhat a beautiful flowers you have made. It looks lovely.
ReplyDeleteKind regards Xandra