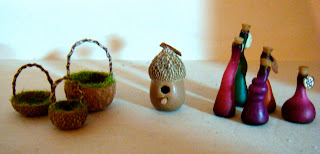
No photographs of my new dolls I am afraid as the light has been awful here this afternoon. Instead here is the Apothecary with most of the hard work done.
The front of the shop has all been assembled, glued, grouted and art mached.
All the wood work has had layers of cream, gold and brown acrylic paint. They have been crackled and sanded for a distressed worn look. I do love these bay windows.
The shop door is made from MDF which is not the easiest of materials to paint and sand but I am quite pleased with the finish. Usual story with these
Sid Cooke kits, there is so little room for manoeuvre, any paint added to the door surround and door means the door simply will not fit. I can't understand why they make them to fit so tight. So quite a bit of post paint, cross sanding went on here!
I have given this shop a 'lead' roof as the design seemed to call for it. I have bashed it around a bit and I will age it a bit more and then hope for it to tarnish naturally.
I wanted the windows to look aged so I laid the acetate on the cushioned pad I use for my flowers making and with a fine ball stylus punched in some old glass blemishes. It almost looks like the bulls eyes you see on really old windows.
I have also painted the acetate with a khaki porcelain/ceramic paint which also adds a slightly dusty and aged effect.
The interior shelving are two really cheap pieces I bought on Ebay and they are the perfect size for what I wanted in the main shop. Quite tall shelves and a deeper shelf at the bottom.
I will be using LED lights within the shelving to ghost through all the potion jars that will eventually line the shelves. The middle will have a very special opening door that will be surrounded by hanging herbs and barrels.
This counter has also been painted and will need a bit more sanding before restoring the 'glass' and drawers. I think this piece is ideal as a counter as you can add so many things to it, all of which can be seen either through the counter top or front.
Unfortunately I cannot remember where I bought it!
A close up of the paint work. This effect has come through a mix of sanding and crackle glaze over many days and layers
It just needs a tiny bit more work and then I will add some Rub'n'Buff in gold to a few of the edges.
The inside roof wall has been bricked and grouted too. I was initially going to ridge tile the edges but when I had a little play with a few I had they just did not look right, a bit clumpy, so I went with ArtMache rendering instead.
I have nearly achieved my goal of finishing two carcasses by Christmas. I will now start ageing the ArtMache and pavement paviors a layer at a time. I can't do the bottom bricks because I am waiting for some more to arrive to finish off the right hand side wall. It doesn't matter how many I order I never seem to have enough.
I tried to get some at KDF but they had sold out of the type I wanted. I hope they arrive this week because once the cast comes off on Friday, I will have to lay down tools and begin the great Christmas rush before my children come home from Uni and my family arrive to eat me out of house and home!!!
Plus I really will have to dust those skirting boards!


