I know I am always saying this but I am always stunned by how long everything seems to take. Then I start thinking about all the artisans and artists who are constantly producing amazing items in their Etsy shops or for shows. How do they do it? I know I am a home crafter and slow but goodness they must put so much time in to even the smallest pieces and then people come along to their stand and raise their eyebrows at a plant for £20. How soul destroying that must be.
So......I have made lots of wire trees in a variety of sizes.

Then I came across a tutorial on the Lead Adventure Forum which I assume is for collectors of lead soldiers which uses tissue for wrapping frameworks, so of course I had to try this method.

Really simple, just apply any old tissue with lots of PVA glue.

I decided to have a go with my 'pineapple' tree because I really don't like the way this trunk has turned out. Now it needs to be left alone to dry at least overnight.

I have had a play in the room box to check the heights as I have gone along and to see how many I will actually need. I am always a bit gung ho when doing something new and cannot resist trying out loads of different methods with various items I have hoarded over the years. This might be a reason my projects take so much longer than I anticipate.

Plus I have to keep telling myself that the trees are background so they don't all have to be individual masterpieces. I read a great series on painting and finishing trees on the blog Needle and Clay where the artist gives some really good advice about colour choices and mixes so I decided to use Burnt Umber as my theme colour for my wood. I have painted some with a straight Burnt Umber base, some with a Burnt Umber/Black base and some with a Burnt Umber/Yellow base. The idea being that you start with your darkest colour and then add lighter mixes by dry brushing over these base colours.
Dry brushing should high light all the ridges and shapes of the trees and bring them to life.

Painting all the trees was quite time consuming, especially the wire ones, and you must let all the coats dry before attempting any dry brushing so there is a lot of waiting time.

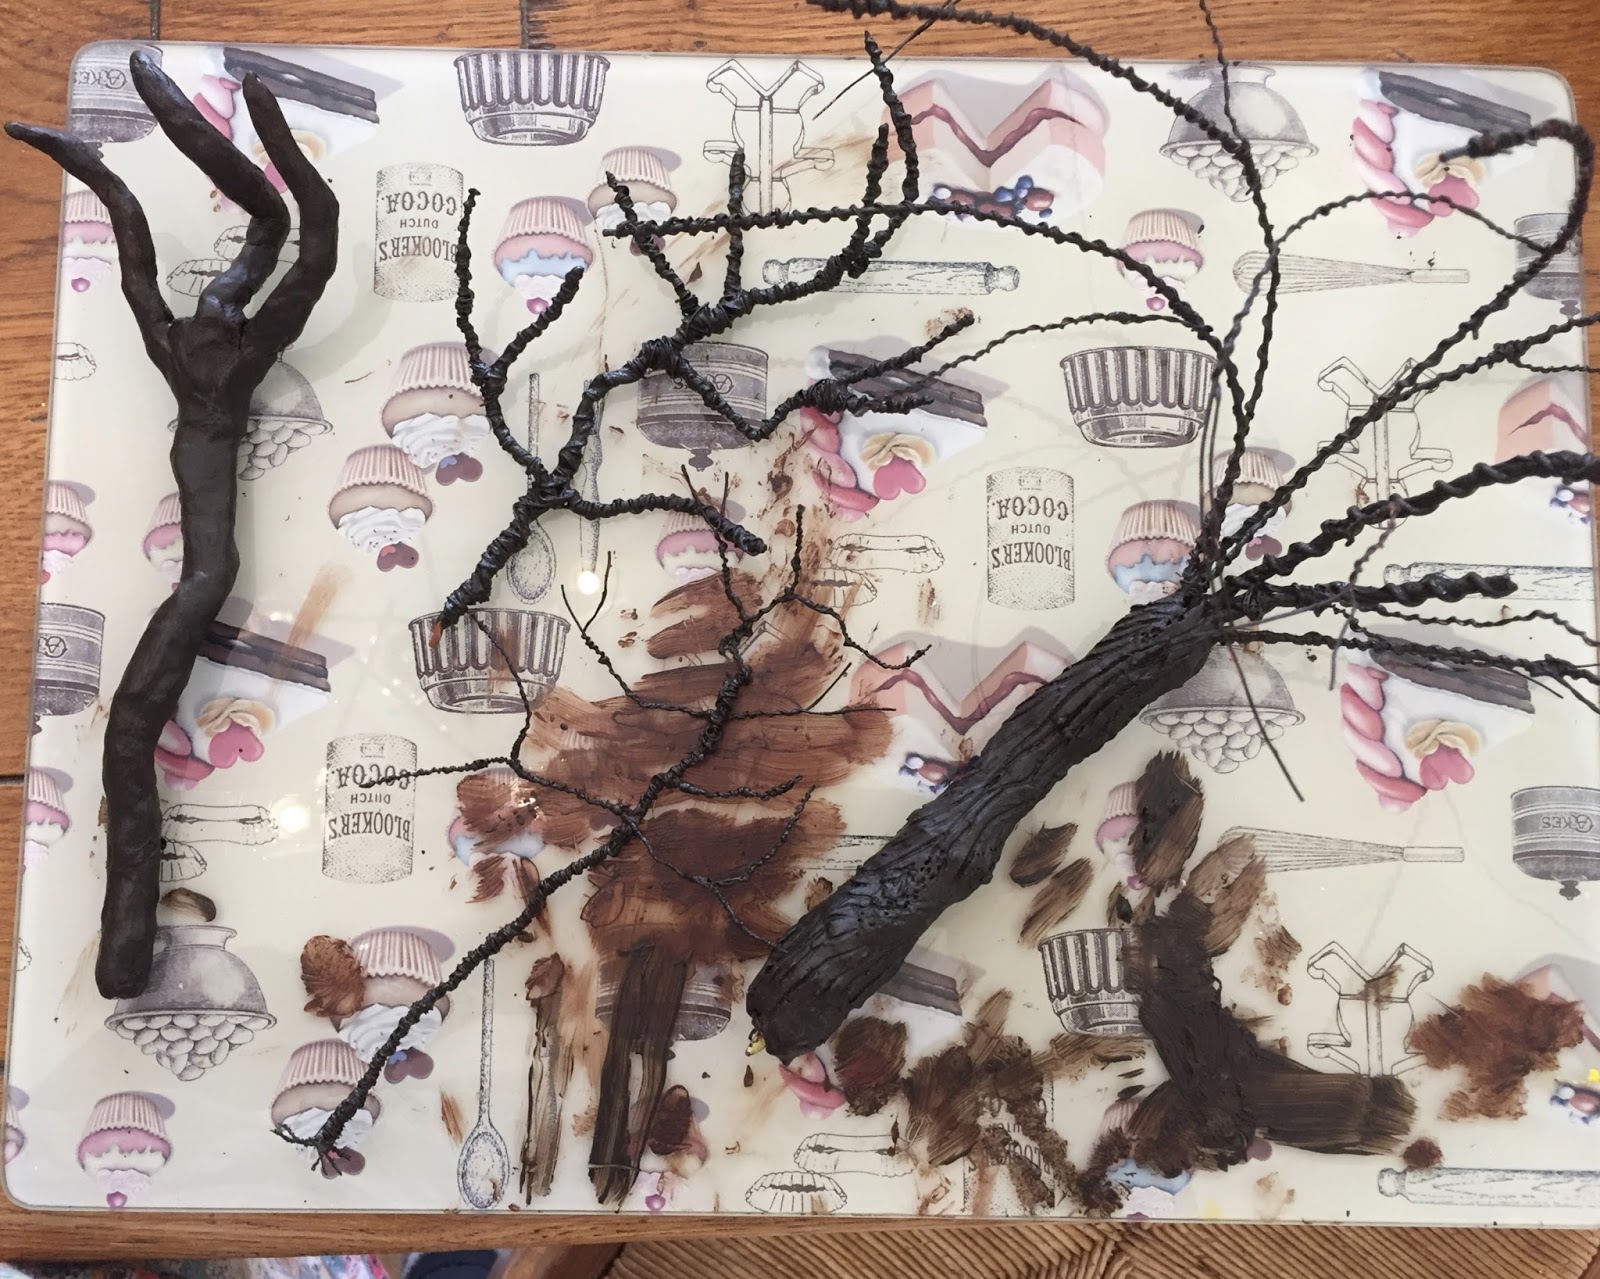
These are all my air drying clay trunks. I have to say that the Creative PaperClay worked much better than the much cheaper Hobbycraft clay. There was no cracking and it went on much better.
After the base coat I then mixed the Burnt Umber with various amount of yellow and started dry brushing.

This is quite a hard technique I think as you have to be so restrained and trust the method to work. It's very hard to believe that using a brush with all the paint wiped off will actually work.

Somehow it actually does and all my trunks have come up really well.

This picture has come up a bit dark but I think I have done enough now. They will have leaves added which will make some of them spread out more. A couple are too tall but I simply snipped of their tops to make them fit.

I think there will be enough variation of colour and they won't be too dark. I intend to have a few LED light strips in the flower beds that should brighten up any dark corners.

I haven't added any scenic moss or green moss paint to the trees yet I will wait until planting to do the finishing touches.

Today I have begun punching leaves. My that is a task and a half!! I have a very bruised palm this evening. I started with various Mulberry papers I had in my stash but the punches did not like them at all. So I added different colour paint layers to the sheets.

The green sheets that I was hoping to use are much too dark and pretty one dimensional. It appears you need a mixed variety of leaves otherwise the leaves just disappear into each other. I decided to give the paper a coat of gel medium too, one side gloss and one side matt. I am hoping that the mediums will give the papers more body so I will be able to use the leaf punches I have been collecting. I have absolutely no idea if this is the best thing to do but I suppose I will find out tomorrow!
There seems to be a whole variety of views as to what is the best type of paper to use for miniature plants so I have ordered a couple of types that I will paint myself plus I will try printer paper as seen on Otterine's Miniatures.
Glad to be moving on to new things now and learning new things all the time.
Which is just as well as the weather is awful!!
Has conseguido unos bonitos troncos.
ReplyDeleteGracias Isabel.
DeleteLove the tree trunks!
ReplyDeleteThank you Marilyn. Now I need to add leaves and stop playing!!
DeleteThe trees look excellent Janice. The painting technique really does give a realistic variation of colour on the trunk. I like the fact that the trees vary in size and shape too - looks quite magical
ReplyDeleteThe bark on those painted tree trunks looks absolutely great :o)
ReplyDeleteLos troncos son perfectos,has creado unas cortezas muy reales!!Ánimo con las hojas!!!!
ReplyDeleteBesos.
Your trees look great Janice, and you are right regarding how long hand made items can take. It really is a labour of love. Probably a little late for this but I have used a texture paste (available from art, craft, scrapbook stores) for going over wire trees. It's quickish and easy to brush on and makes a rough texture. Hope your leaves cut better!
ReplyDelete