Gosh how time flies when the weather is awful and your three children return from a year at Uni! How do you get all the washing dry when it won't stop raining!!??
Well I have finally got out of the utility room, one end of my lounge looks like a car boot sale and the ironing board has been banished for the weekend.....so here are some pictures of what I have managed to fit in over the last few weeks.
Lots of brickwork beginning with the front panel and the paving paviors from
Richard Stacey
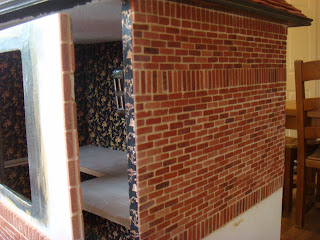
Both side walls follow the same pattern and all the bricks have been sealed and grouted. This was a very long job but quite calming once you get into the swing of it.
The roof is quite large on this shop and I wanted to avoid using ridge tiles along the roof joins as I didn't like the look of these joins on my previous corner kits. At the edge I have sanded down the roof tiles.
Once I had finished the roof tiling on both sides, front and back I laid a line of over lapping roof tiles down each edge after sanding them flat.
I am really happy with this tile frill as it looks a lot neater than the traditional ridge tiles.
The top line of the roof still needed the finishing touch of traditional ridge tiles though so I wandered the streets of my village peering closely at various Georgian houses, with the dog so I would not be mistaken for a peeping Tom!!
This was very instructional as I discovered that the tiles were stuck on with mortar and this allowed them to sit proudly.
I built up a ridge of grout along the top and then squidged the ridge tiles in place. This worked really well once I had also added some PVA to the grout to make sure the tiles stayed in place.
This is a large roof space and tiling was very time consuming!!
Although the roof tiles are a variety of colours I decided to try my hand a more paint effects after my roof research. This is the first layer of grime and I have gradually built up darker layers.
This
Sid Cooke kit comes with two lower round bay windows but I wanted top bays as well. Sid Cooke are now selling extra parts for their kits which meant I could add the extra bays with a bit of tweaking.
The fit of the top bays is by no means perfect as the window openings are the wrong size but I am doing my best to hide this with paint and mouldings.
Flourish and Blotts' exterior with the vast majority of the grunt work completed. Windows in, brickwork distressed and ArtMache render drying off nicely.
This time I went back to the tried and trusted method of marking where all the mouldings would be glued and then laying on the ArtMache. I have not glued in the window panes yet as I want to be able to dress the windows from all angles.......eventually!!
The brickwork and roof do look a lot more aged in real life but they still need a couple more coats of grime I think. The 'bashed' top bays were a little fiddly to install but a lot of PVA plus the render appear to have fixed them in place quite solidly.
Once the render is completely dry I will be able to start the griming and ageing. These layers will really bring the whole shop together.
The 'bashed' top bays were too wide for the pre-cut openings so I have painted and crackled a strip along the side to imitate the black/gold interior and wood work. This blends in surprisingly well although the interior will need a bit more work.
Lastly I have made this little oblong balsa box for the back door of the shop which will be a false hallway complete with book piles and bustling customer I hope.
I have commissioned the made to measure bookcases and they are due to arrive on Tuesday which is very exciting but also completely terrifying. I prepared all the measurements and plans so if they don't fit it will be a very expensive mistake. They are the biggest commission I have ever made so I am keeping everything crossed at the moment!!
The sun is supposed to shine tomorrow, oh wouldn't that be nice!!
Have a great weekend everyone.


